a puppy love quilt

puppy love quilt

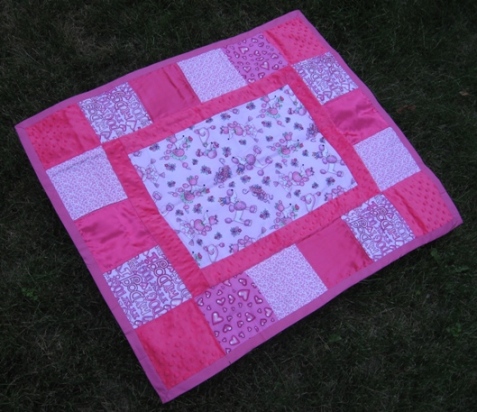
Awfully sweet, isn't it?

So what’s worse? The fact that I probably started this quilt for my niece’s 1st birthday and that she just turned 2 in july? Or that even though I finally finished it, I have managed to bring it over to give to her?

In any case, I picked up this quilt kit on sale at Joann’s long enough ago that I can’t remember the details… However, over the last x number of months, I’ve been working on it with the idea of giving it my niece. (Well, technically she’s my fiance’s niece, but does that detail really matter?) I can’t recall if the kit pieces were cut out or not, but I do have vague recollections of doing some cutting so I’m going to guess not.

I really don’t enjoy quilting which I think is why I bought a kit so I didn’t have to put much thought into it.  I did end up sewing the entire thing by hand, including the piecing. The quilting itself probably took the longest – mostly I just kept getting bored with it.  Each of the outside squares is quilted 1/4″ away from the seams, as is the large center panel. Then in the large panel I also quilted around each bunch of large flowers to help hold the layers together. Although you can’t see it in the picture, the backing is the all-over pink and white printed flannel – the same as some of the small squares.
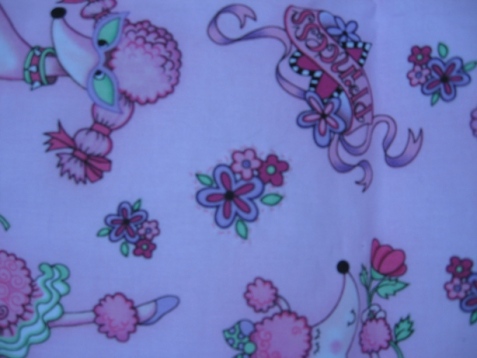
Very fuzzy, but if you squint and try real hard, you can see the stitches around the large bunch of flowers!

A basic store-bought quilt binding in bright pink was also handsewn along the edges to finish the quilt. I must say, all in all, it turned out quite charming… but I am NOT in a rush to make any more quilts. (But I am happy to have one gift to store away until Christmas!)
a bright & cheery bra

Yes, you read that right… Today’s post is one in a series (hopefully) of projects I’ve been sewing this summer but never quite got around to writing about. Apparently I need a little cheering up and so looking back at how many projects I’ve finished should help….

I’ve had the fabric and notions for a few bras since taking the fantastic bra-making course with Marijane Johnson back in June. However I don’t think it was until sometime in August that I actually got around to cutting one of them out! I will say I’ve been wearing the boring old flesh-toned bra I made in class for months… but it’s now much more fun to wear the white, green, red & orange mod print bra! With a little bow in front of course.

Are those not odd shapes or what?

My class bra pattern was a Pin-up Girls Pattern, size 32E with lots of adjustments. I tweaked it further for the latest bra (and could probably still use a few more tiny tweaks – but the fit really is damn near perfect.) My latest version of the pattern has been transferred to swedish tracing paper so I’m not dealing with all the slashed, spread & taped pieces any longer!

Cutting out the pieces is pretty quick – and about the only thing I use my rotary cutter for. I’ve never liked using them… but they sure do make a difference with working with stretchy lycras! Unlike my class bras, this new one used two layers of fabric (I can’t remember what the underlayer is called) but the upper layer is basically swimsuit material. Very bright swimsuit material.

I did say it was bright!

All of the construction technique were learned in the class although I did have to refer to my notes and the text we used, The Bra Maker’s Manual, fairly often since it had been two months since learning it all! I’m still pretty impressed that it’s possible to make these at home on a regular sewing machine – but a great deal of it is having all the right materials.

You can see the two fabric layers here

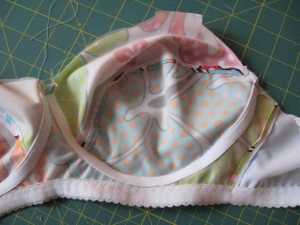
The close-up shot of the inside of the right cup shows some of the other materials and techniques, including the underwire casing and the back band fabric. The underwire casing is pretty neat – it’s actually a tube so you sew it down and then pop it open and slide the underwire inside the casing itself, rather than putting the underwire between the bra fabric and the casing. All of the exposed seam get ‘butterflied’ or opened flat and edgestitched 1/8″ away from the seam on each side. Sure enough, if you look at RTW… you’ll find the same thing.

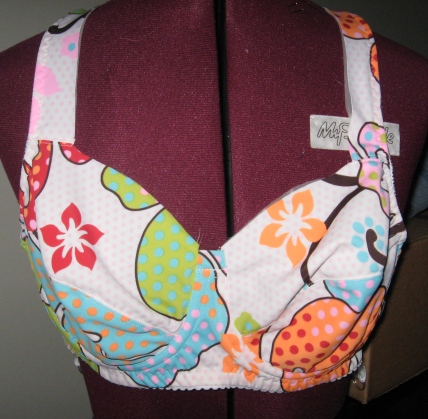
I don’t have any photographs of the finished bra, because, well… there don’t need to be any picture of me wearing it on the web! However, here’s the last photo I took of the process which shows everything in place except for the neckline elastic and the little white bow I eventually added in front.

And I wonder why my dress form doesn't help with fitting. There are no hollows when this is on the body!

Did I mention that I have a matching pair of boy shorts with hot pink beaded lace for the waistband? Yes, indeed….

a few things with Kenneth King

Life’s been busy. And crazy. And sad. And every once in a while life is happy.  This past weekend was one of those happy times. The well-known couturier Kenneth King was in town to present a lecture and two classes. My head was filled with inspiration and ideas taken from his incredible photos of architecture and totally over-the-top finished coats, bags, and hats from his collection. And my hands? Well, my hands were kept busy learning a new technique to insert welted pockets, plus seeing the steps to create a ‘seamless’ pocket welt and a facing seam pocket for jacket or coat interiors.

Then the real fun happened… (after a quick break for sushi!) when Kenneth began the embellishments class. Of course pictures would help (they’ll get added sooner or later… I’m just happy to find a few minutes to write!) but all I can is that this class was so much fun. It involved layering braided trim, satin rattail cord, beads, and other such things onto a combination of silk and felt that had been basted together. As silly as it sounds… he taught some damn cool tricks – and yes, I’ll be adding his latest book to my collection! The embellishing process involved finishing the braid seamlessly and as someone who doesn’t take the time to be creative in such ways… it was immensely relaxing and I loved playing with all the bits and pieces and handsewing my way through all of it. I have grand plans to make an evening bag using the techniques… let’s see if that happens ;o)

All of events with Kenneth King were held at Unique Boutique Boston – my favorite place to sew (aside from own my couch or studio!) because there’s just a great atmosphere there. They have a bunch more classes coming up that I need to add to my calendar…

And if that wasn’t enough for one weekend… I spent late Sunday afternoon checking out the grand opening of Silk Road Fabrics and picking up some beaded red velvet trim for my in-progress cocktail gown. It was fun to visit all the pretty fabrics again – and amazing to run in to many of the same people that were at the Kenneth King programs the day before. (Apparently we were traveling in packs…) The weekend ended with the Pattern Review book launch party where I got meet the PR Founder, Deepika – as well as bunches of other fun people.  Plus Laura’s Sewing School, the host of the party – was super neat to check out. I got my new book signed and finally made my way home.

Yes, it was a happy weekend… and tough to return to work on Monday!